tie dye steps after dying
After getting things ready it is time to tie-dye with acrylic paint. Step 1 Fill a bucket halfway with white vinegar then add enough cool water to fill the bucket the remainder of the way leaving a few inches at the top.
Tie Dye Instructions A Step By Step Guide Favecrafts Com
You can simply use the vinegar.

. After that you have to put the garment into the dyebath. After the dyes have set up over night or for 6-8 hours rinse the shirt until the water runs clear. After this you should spray with color so that the color can go around the fabric.
Finally follow the last basic step step 5. When a piece of clothing or garment is tie-dyed this means that it is tied in knots and then put into the dye. Accordion-fold the folded shirt evenly again starting from one side.
Fold again in half after that once again so that eight layered panels are obtained. You can make different patterns depending on how you tie the knots. Afterward you can strain the dye solution through cheesecloth fabric to make sure there are no undissolved particles if you find the dye is not dissolved.
Step 2 Place your newly tie-dyed garment in the bucket. Pour in one to two cups of vinegar. Then scrunch smaller sections of the fabric together randomly.
Were talking about setting your tie dye. Apply a different color of dye in each wedge created by the crisscrossing rubber bands. Prepare the garment First you prepare your garment by gathering the fabric in the desired places and tying it with the parcel cord.
The rubber bands and fabric segments should resemble pieces of a pie. Apply the dye in rainbow order to get a rainbow spiral design. Ombre Tie Dye Technique.
Youll also need something to tie dye like a T-shirt or tapestry bedding etc. Shibori Tie Dye Technique This is a Japanese tie-dyeing technique that employs several folding methods including accordion folding. First lay the shirt flat.
Twisting the fabric starting in the center is one of the most classic ways to tie dye. Take off the flame. The tie dye design you choose will determine the number of colors you will be using on your tie dye project.
While many dyes for tie dyeing are non-toxic they can still make a mess. Pick your tie dye colors. Use gentle color-safe detergents.
Make sure your rubber bands are not too tight. Use rubber bands to. Begin by tugging up small sections of the t-shirt between your thumb and forefinger.
Starting from the bottom edge accordion-fold the shirt in even folds up to the top. This is how I dyed. Step 2 Mix each color of dye in a plastic squirt bottle.
The more string you use the more parts of the shirt will remain in the original color after dyeing. Dissolve the dye in this water stirring continuously. H ow to tie-dye step by step Step 1.
Spiral Tie Dye Pattern Watch later Watch on Use rubber bands to hold the design in place. Heat the water in your pot up to 70 degree C. Setting Color After Dyeing Download Article 1 Dilute vinegar in a bucket or large glass bowl.
Dye fixative Salt or soda ash A container and hot water A tarp or plastic cover White T-shirts. Spiral Tie Dye Pattern To achieve the spiral pattern simply start by pinching your thumb and index fingers on the shirt and twisting. Now wash it in the washing machine.
So dont skip this easy step. After the first couple washes wash tie dye in cold water to prevent dye from fading. How to tie dye a circle t-shirt 1.
Next you let it dry. STEP-BY-STEP Step 1 Prepare your tie dye area by laying down a tarp or plastic sheet. Then bundle the fabric with rubber bands so that they criss-cross each other.
Continue tying off the circles all over the t-shirt like this. For the Full Mandala Tie-Dye Technique we recommend having a washable marker some wax string to help you achieve a super tight bind after folding and some scissors for later removing the string. Fin Then its time for the big reveal.
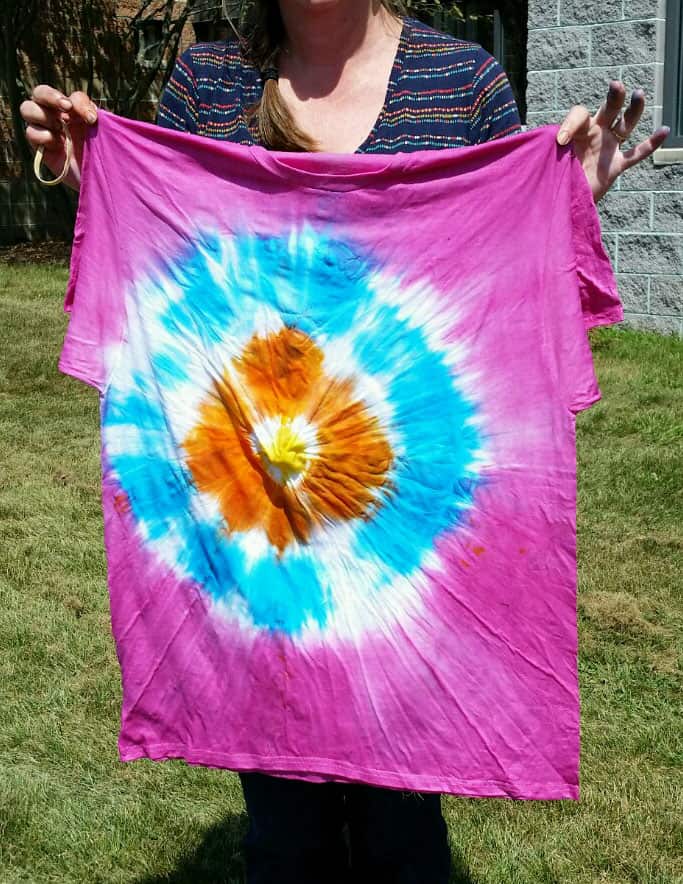
Pull the rubber bands off your shirt and shake it out to see your design. Wear the rubber bands and hold the tip of the fabric to avoid squirting. The vinegar helps with colorfastness.
Whatever you wish to tie dye. The final design is given below 7. Ask Question Step 10.
Scrunch or Crumple Tie Dye To make a crumple tie dye aka scrunch or nebula design. Use the special dye bottles to apply the dye to the folded edges of the fabric on both sides. Rinsing your tie dye item After your 24-72 hours its time to get rinsing.
Make sure your fabric is made of a 100 natural fiber fabric. Twist until the folds in the shirt form a circle. Folding Tie Dye Technique First fold your fabric in half.
And when you untie the knots there would be irregular circles dots or even stripes. Before I started I doubled the fabric so that the effect would come on both the ends. The first thing to do is to mist the article of clothing by spraying it with water using the spray bottle.
Allow it to soak for 30 minutes so the vinegar can help set the fabric dye and help your garment retain colorfastness. Before taking the elastic bands off rinse in luke-warm water. Now take the bead which you have wrap it around the doubled cloth and tie the string around it as securely as possible.
Try soaking your tie dye in equal parts white vinegar and cold water for 30 minutes after you initially rinse out the dye from your garment. Now scroll on to see our step-by-step guide on how to. Wear gloves to avoid staining your hands and an apron to protect your clothes.
Step three is a step that is often over-looked and skipping it means that the designs that you worked so hard on will fade more quickly over time. How to tie-dye quick guide Wet then wring out a cotton shirt Fold and tie the shirt Prepare your colors Apply dye on the fabric Let the dye react for 8 hours Rinse out the shirt Wash your new tie-dye shirt Before you grab your dye bottles and pour. Step 1 First dampen the shirt then lay it flat on the work surface.
Check the color strength on a scrap. Using an elastic band or a piece of string wrap around the circular section tightly and knot to secure in place. Grab the fabric in the center either of a bra cup or your bikini bottom and then twist it tightly.
Add a generous sprinkle of sea salt or table. Show a bit of muscle here because later when you dye the cloth you dont want the dye to reach the cloth. And contrary to what you may have read you dont need any obscure or fancy ingredients like soda ash.
How To Tie Dye Easy Techniques For Beginners Sarah Maker

How To Tie Dye Best Tutorial For Beginners Treasurie

Mrs Sheridan S Tie Dying Instructions Table Of Contents Tie Dying Kits Buying Tie Dying Materials Selecting Colors Of Dyes Mixing Colors Primary Color Ppt Download

Friday Crafternoon Tie Dye New Brunswick Public Library Teens Tie Dye Diy Tie Dye Folding Techniques Tie Dye Crafts

How To Wash Tie Dyed Fabric With Pictures Wikihow
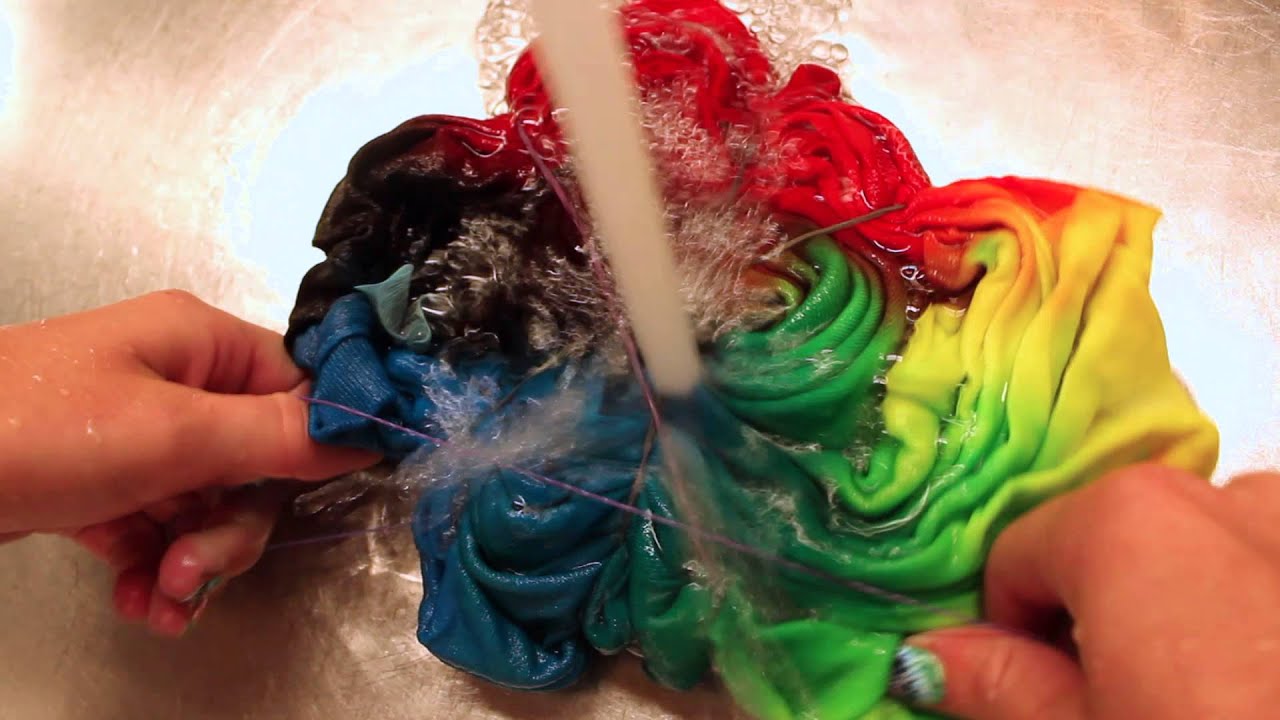
How To Properly Rinse A Tie Dye T Shirt Youtube
/how-to-tie-dye-1245650_Final-5bbd0c65c9e77c005897b360.png)
How To Make Tie Dye Clothes And Crafts

Tricks And Tips For Tie Dye
Discover Important Tips And Tricks When Creating 6 Colour Tie Dye Rainbows Tips On How To Put The Dye On Diy Tie Dye Shirts Tie Dye Kit Tie Dye Patterns Diy


